- FAQs
-
Tutorials
Product Tutorials
- AV Voice Changer Software Product
- Voice Changer Software Diamond 9
- Voice Changer Software Diamond 8
- Voice Changer Software Diamond 7
- Voice Changer Software Gold 7
- Voice Changer Software Basic 7
- AV VoizGame 6
- AV Music Morpher Products
- Music Morpher
- Music Morpher Gold
- Video & Webcam Products
- AV Video Morpher
- AV Webcam Morpher
Freeware Tutorials
- AV MP3 Player Morpher
- AV RingtoneMAX
- AV DVD Player Morpher
- AV Video Karaoke Maker
- AV Digital Talking Parrot
- AV Tube
- AV MIDI Converter
- Media Player Morpher
- Media Player Morpher
- AV Audio Converter
- AV Audio & Sound Recorder
- AV Audio Editor
- AV Audio Morpher
- AV CD Grabber
- AV Media Uploader
- AV Video Converter
General Tutorials
- Update log
- Add-ons
- Forum
- Press releases
Customer Login
- Change voice when live streaming with Xsplit Broadcaster
- Voice-over Your Characters on GoAnimate
- Change voice during call from PC to Android phone
- Screen recording with Bandicam in morphed voice
- Broadcast on Mixlr with changed voice
- Convert stereo to mono with Voice Changer Software Diamond 9.5
- How to use Non-human Voices in VCSD 9.5
- Export customized Nickvoice into a file
Voice-over Your Characters on GoAnimate
(4.9 out of
5
based on
91 votes)
GoAnimate (formally known as Go!Animate until 2013) is a cloud-based, animated video creation platform. It is designed to allow business people with no background in animation to quickly and easily create animated videos. These videos can be created in multiple styles, including 2D animation, whiteboard animation (a.k.a. videoscribing or scribing) and video infographics.
In this tutorial, we will demonstrate how to use Voice Changer Software Diamond 9.5 (VCSD 9.5) to narrate or voice-over your video projects on GoAnimate.
| Click on the steps below to start | Expand all | Collapse all |
 |
This step is no longer required if you are using the build 9.5.21 or newer. Since the release of Voice Changer Software Diamond 9.5.21, Virtual Audio Driver (VAD) Mode is the default and primary working method. This change is guaranteed not to impact software performance and user experience quality. |
|
| To connect Voice Changer Software Diamond with another VoIP application: Change the program’s microphone input to VAD. » Details in Step 3 below. | ||
| To process a list of ready audio files: Take advantage of the premium feature File Morpher. » Details in this tutorial. | ||
- On main panel, choose Preferences (1) menu to open VCS Preferences window.
- When VCS Preferences window appears, choose Virtual driver Mode radio button (2).
- Click OK button (3) to apply the new setting and close Preferences window.

- Go to VCSD 9.5's main panel, choose the morphing effects and make adjustments until you are satisfied with your vocal output. There are several ways to change your voice, including voice morphing and audio effects.
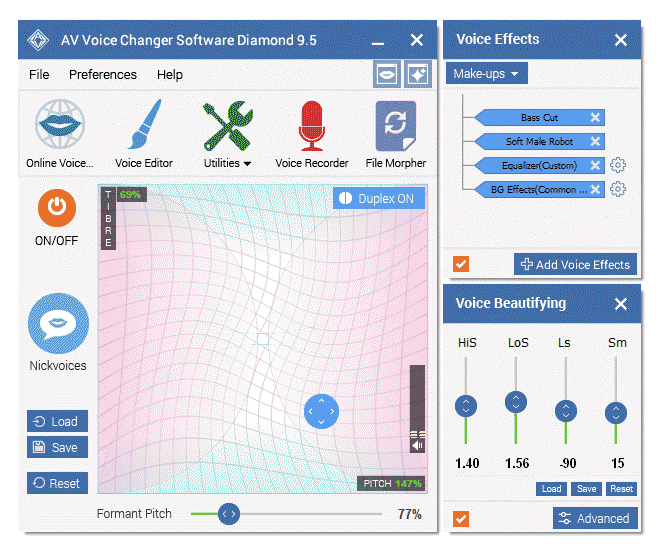
» You should read this guide for more in-depth information: How to use Voice Morpher in VCSD 9.5
» Check out our Add-on store to download FREE cool audio effect packs, updated regularly.
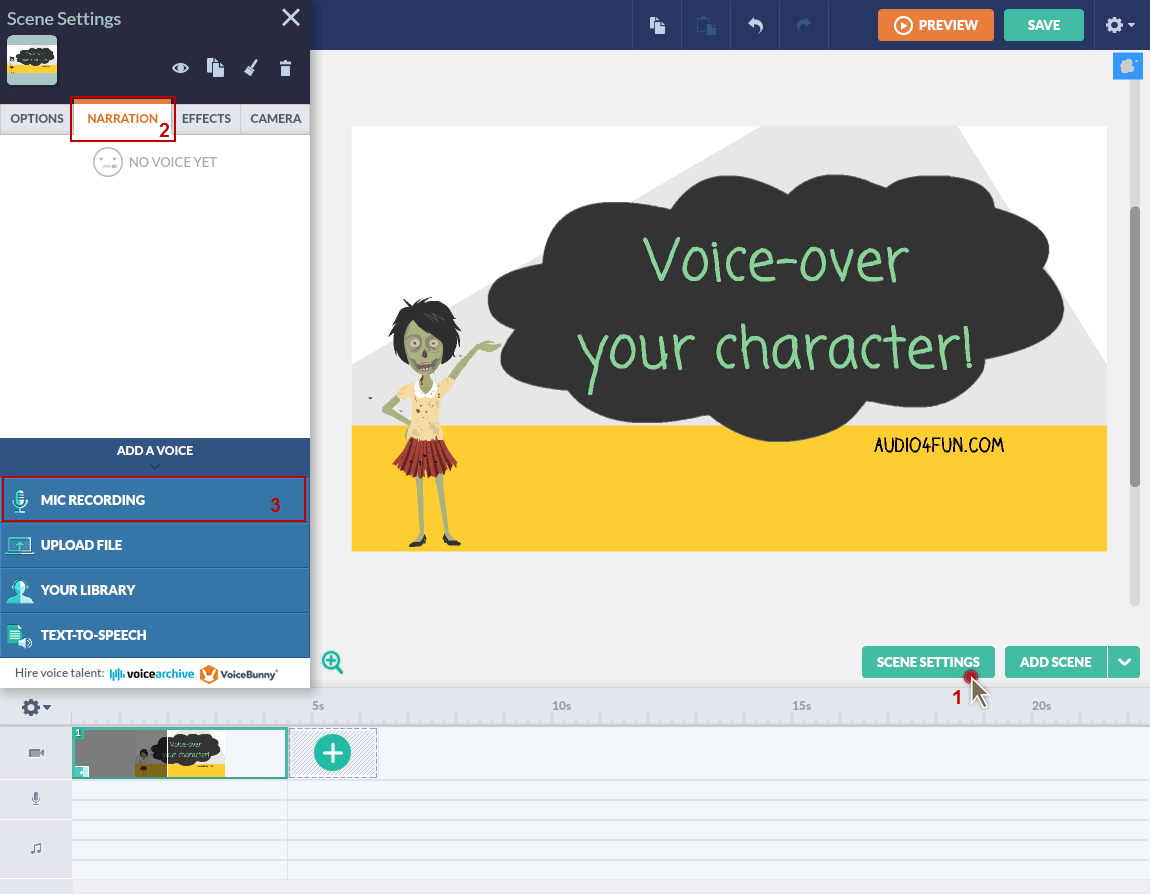
- Go to https://goanimate.com/ and start your video project.
- Select the scene that you want to add voice narration » Choose Scene Settings (1).
- On the Narration tab (2), select Mic Recording (3).
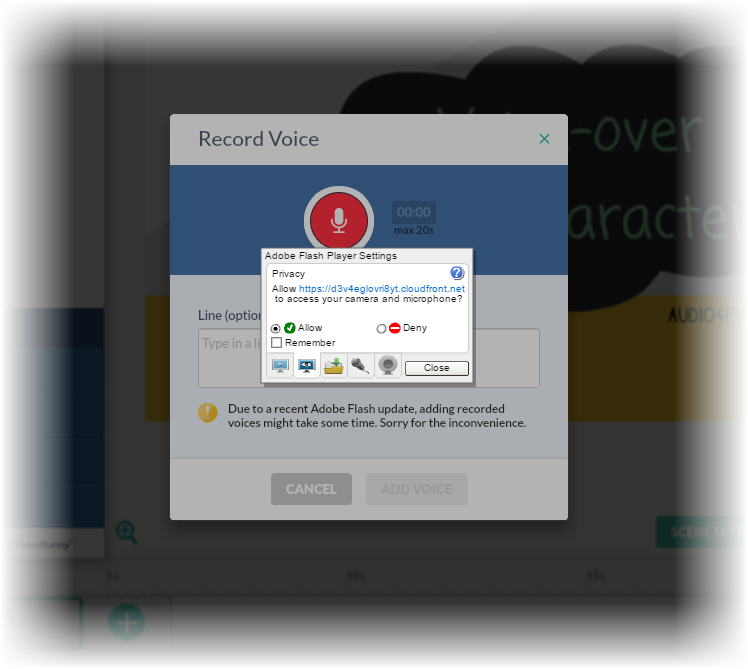
- When Adobe Flash Player Settings dialog box appears, click Allow to grant the service access to your camera and microphone.
- Then switch to Microphone tab (4) and choose Microphone (Avsoft Virtual Audio Device) (5) in the drop-down list » Close the dialog box.
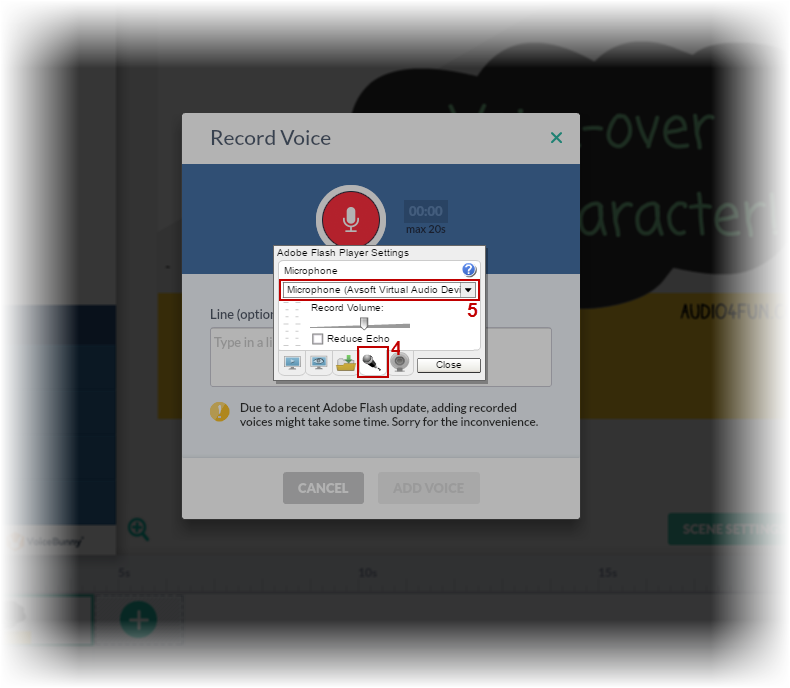
Now VCSD 9.5 will become the main audio processor on GoAnimate site.
- Back to GoAnimate, press Record button and start talking. Your voice will be auto morphed by VCSD 9.5.
You can record up to 20 seconds each time. Press Stop when finish.
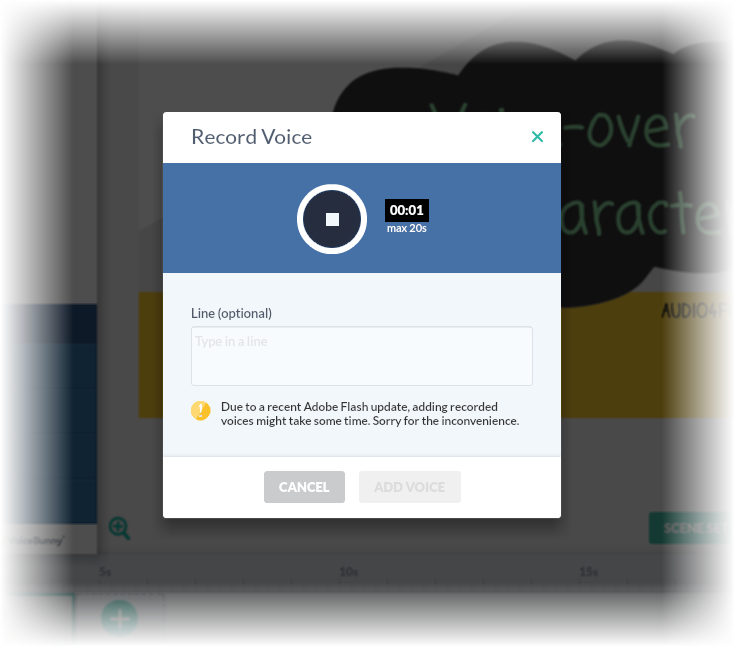
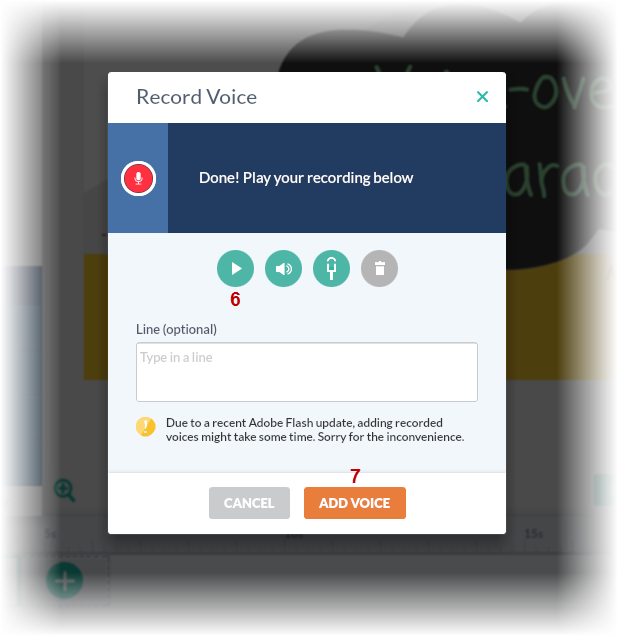
- Preview your recording (6). If you are satisfied with the result, click Add Voice (7) to add it to the scene.
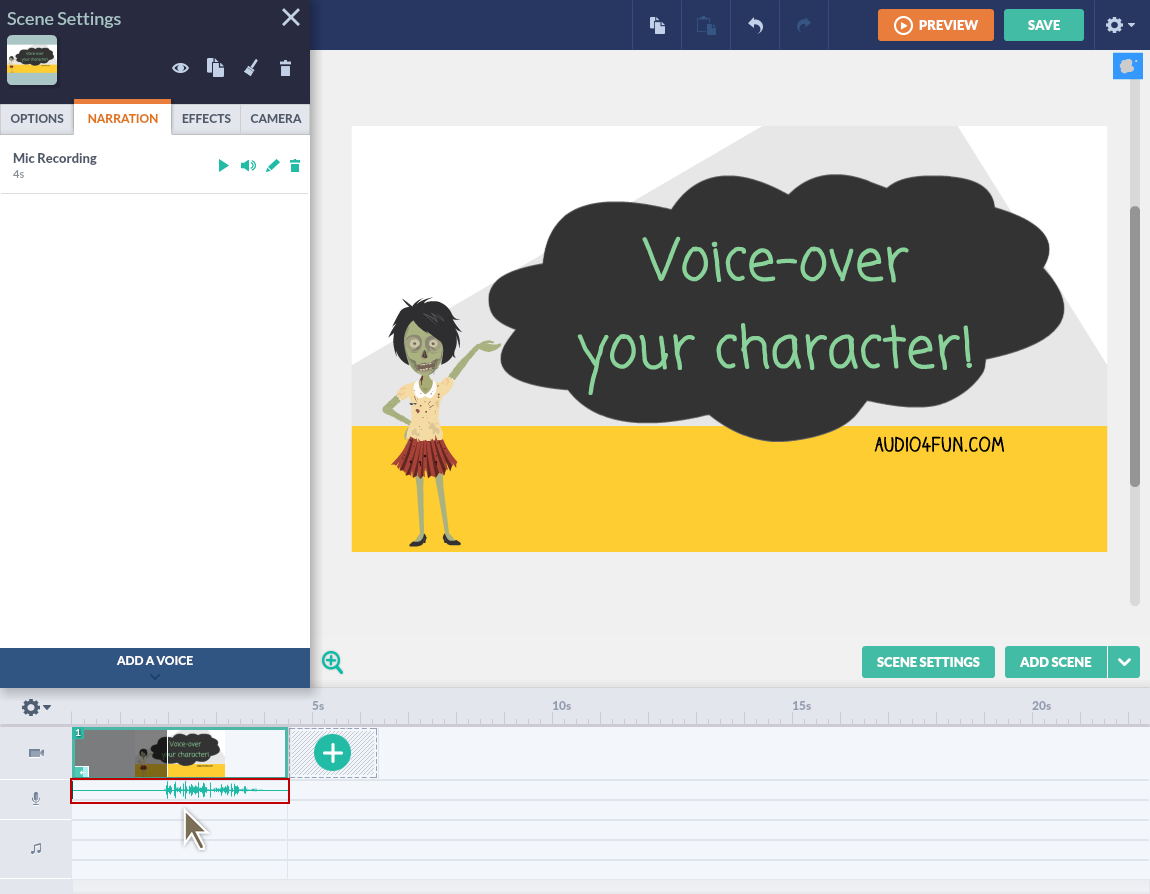
- Shortly, your newly added voice will be showed on the timeline.
Subscribe newsletter
- Product using tips
- Free gifts
- Special discount offers