- FAQs
-
Tutorials
Product Tutorials
- AV Voice Changer Software Product
- Voice Changer Software Diamond 9
- Voice Changer Software Diamond 8
- Voice Changer Software Diamond 7
- Voice Changer Software Gold 7
- Voice Changer Software Basic 7
- AV VoizGame 6
- AV Music Morpher Products
- Music Morpher
- Music Morpher Gold
- Video & Webcam Products
- AV Video Morpher
- AV Webcam Morpher
Freeware Tutorials
- AV MP3 Player Morpher
- AV RingtoneMAX
- AV DVD Player Morpher
- AV Video Karaoke Maker
- AV Digital Talking Parrot
- AV Tube
- AV MIDI Converter
- Media Player Morpher
- Media Player Morpher
- AV Audio Converter
- AV Audio & Sound Recorder
- AV Audio Editor
- AV Audio Morpher
- AV CD Grabber
- AV Media Uploader
- AV Video Converter
General Tutorials
- Update log
- Add-ons
- Forum
- Press releases
Customer Login
How to morph audio files
(4.7 out of
5
based on
30 votes)
File Morpher is a great feature for morphing and adding special effects to audio files. With this feature, you can apply various effects to multiple pre-recorded audio files in batch and convert the output to any audio format. The new build 9.5 now allows users to import not only multiple files but also their existing playlists to morph and convert in just one click. File Morpher feature is now available in two modes: Quick mode and Full mode for different needs of users.
In this tutorial, we will guide you how to use File Morpher feature, both in Quick Mode and Full Mode in AV Voice Changer Software Diamond 9.5 (VCSD9.5).
Remark: This tutorial is only applicable for DIAMOND edition of the AV Voice Changer Software series.
| Click on the steps below to start | Expand all | Collapse all |
File Morpher will conveniently use the settings you created with Voice Morpher to morph your audio files. In this first step, we will show you the basic functions of Voice Morpher.
- Nickvoices (1): the ready-to-use voice presets to change the voice instantly in just one click.
- Pitch-Timbre graph (2):you can move the pointer to change age and gender,as well as remember to adjust the Format Pitch slider to make the voice more natural.
- Voice Effects (3):There are many voice, background and non-human audio effects to choose from.
- Voice Beautifying (4): affect characteristics of the voice and pronunciation.
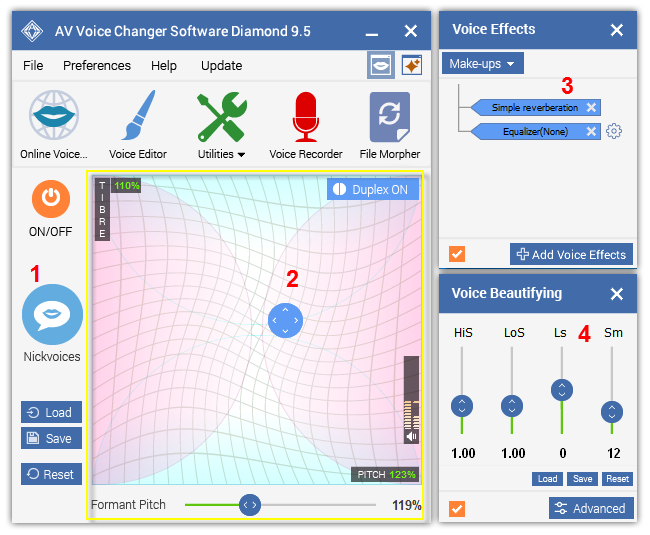
- Click here for more details about changing voice with Voice Morpher.
Full mode will give you the full ability to load multiple files or playlists, quickly apply morphing effects, freely choose output format and output folder, preview and then export.
- On the main panel >> Click on File Morpher icon (1) to open File Morpher window.
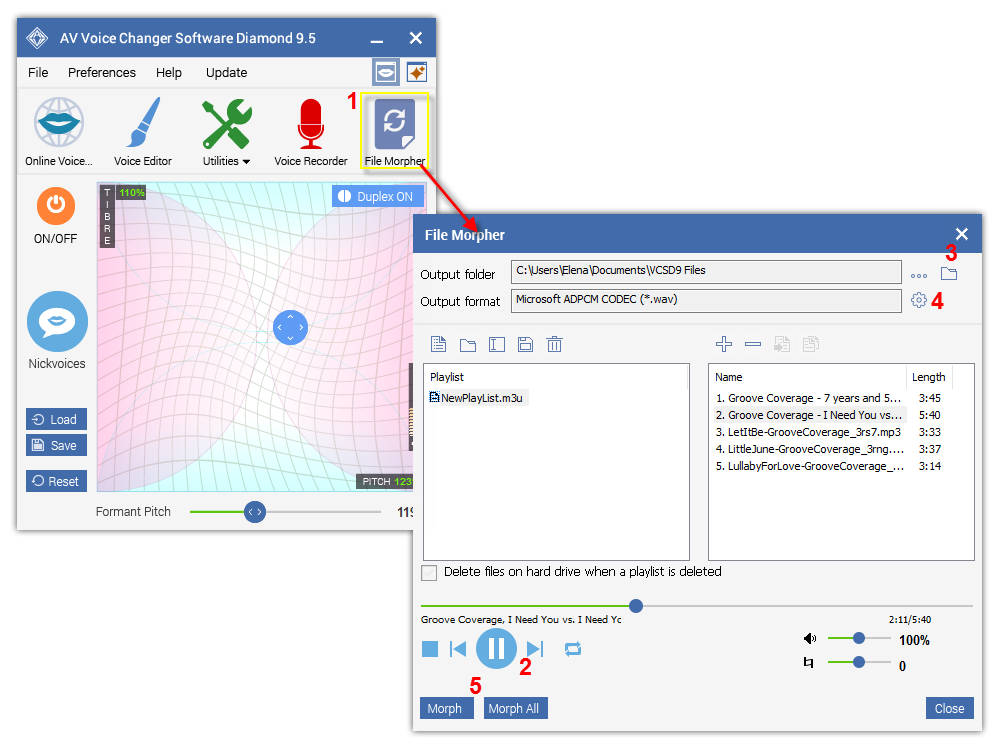
- Create a playlist and add the audio file (s) that you want to morph. Click Play (2) button to preview.
- Click Browse (3) to select new Output Folder to save your files.
- Click Encoding Settings icon (4) and select output format. If you do not know what to choose, use the recommended settings.
Then click Morph or Morph All (5) to start the morphing process.
- If you want to select only some specific files to morph, use Ctrl + left click on those files to choose and then click Morph.
- If you want to morph all of the files in the playlist, click Morph All.
- You can always check the progress of the morphing in Progress section (6). The processing duration depends on the number of files and output quality.
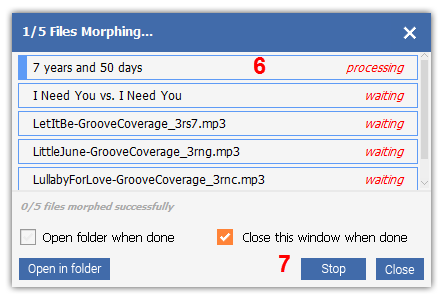
- Use Stop (7) in case you want to interrupt the process.
This mode will automatically use your file format setting in Full Mode to morph, and then save the morphed files in the same folder of your original files.
Note: If this is your first time using Quick Mode, we recommend you to take a quick look at the settings in Full Mode.
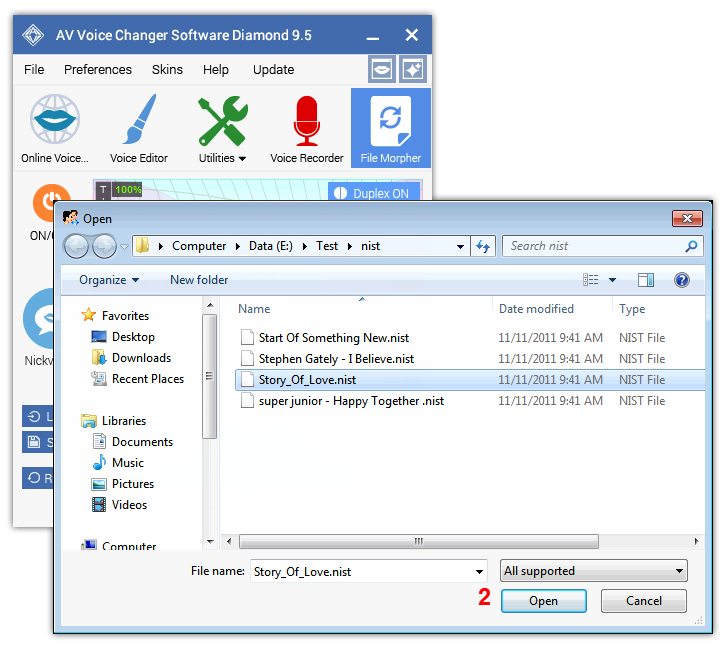
- Go to File menu on the main panel >> Choose Open (1).
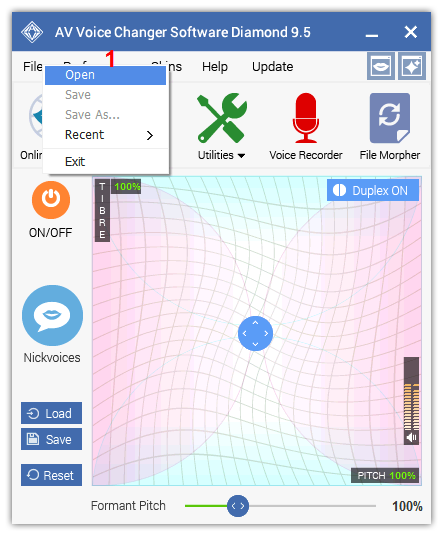
- In Open window, locate your audio files >> Select them and click Open (2). If you want to select multiple files/folders/playlists at the same time, use Ctrl + left click to select the specific files or simply clicking and dragging the mouse.
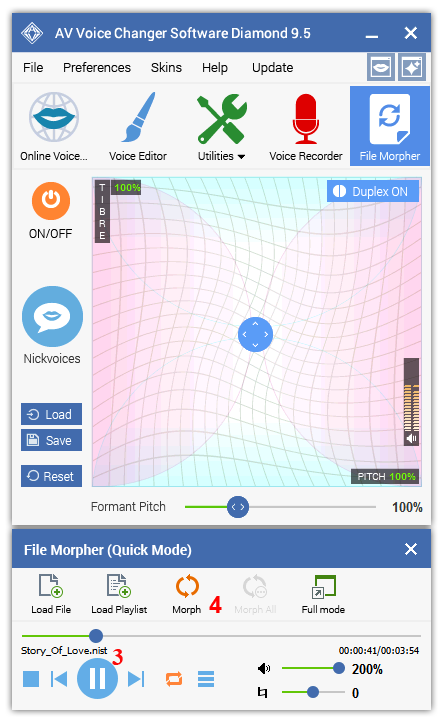
- Click Play (3) button to preview the file(s)
- Choose Morph to process the current playing file; Morph All to export all the files imported.(4)
A new window will appear to show the morphing progress of your files.
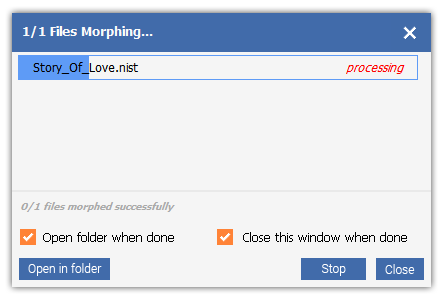
And now, enjoy your new audio files.
» Remember to visit our Add-on store to download new and cool audio effect packs, updated regularly.
Subscribe newsletter
- Product using tips
- Free gifts
- Special discount offers
