- FAQs
-
Tutorials
Product Tutorials
- AV Voice Changer Software Product
- Voice Changer Software Diamond 9
- Voice Changer Software Diamond 8
- Voice Changer Software Diamond 7
- Voice Changer Software Gold 7
- Voice Changer Software Basic 7
- AV VoizGame 6
- AV Music Morpher Products
- Music Morpher
- Music Morpher Gold
- Video & Webcam Products
- AV Video Morpher
- AV Webcam Morpher
Freeware Tutorials
- AV MP3 Player Morpher
- AV RingtoneMAX
- AV DVD Player Morpher
- AV Video Karaoke Maker
- AV Digital Talking Parrot
- AV Tube
- AV MIDI Converter
- Media Player Morpher
- Media Player Morpher
- AV Audio Converter
- AV Audio & Sound Recorder
- AV Audio Editor
- AV Audio Morpher
- AV CD Grabber
- AV Media Uploader
- AV Video Converter
General Tutorials
- Update log
- Add-ons
- Forum
- Press releases
Customer Login
- Cut and Trim Your Video Length
- Using Video Morpher 3.0 to export video clip with your logo on it
- How to use Video Effects like Subtitle and 3D Subtitles - Video Morpher Tutorials
- Installation Guide
- How to convert a DVD or Movie (Video)
- How to make video clip with cool graphic effect in AV Video Morpher
- Add subtitles to video clip and movie
- Making your own CD, DVD
Using Video Morpher 3.0 to export video clip with your logo on it
(4.6 out of
5
based on
29 votes)
Introduction
Adding a logo to the video clip is the easiest way to make a ‘trademark’ for your do-i-yourself video clips. This tutorial will guide you through the way to add a watermark/logo onto a video clip with AV Video Morpher 3.0.
If you want to show an image through out a video clip, this will also the fastest, and easiest way to do.
Steps to take:
| Click on the steps below to start | Expand all | Collapse all |
- Start the program by clicking on the AV VOM icon on your desktop or go to Start >> All Programs >> AV Video Morpher.
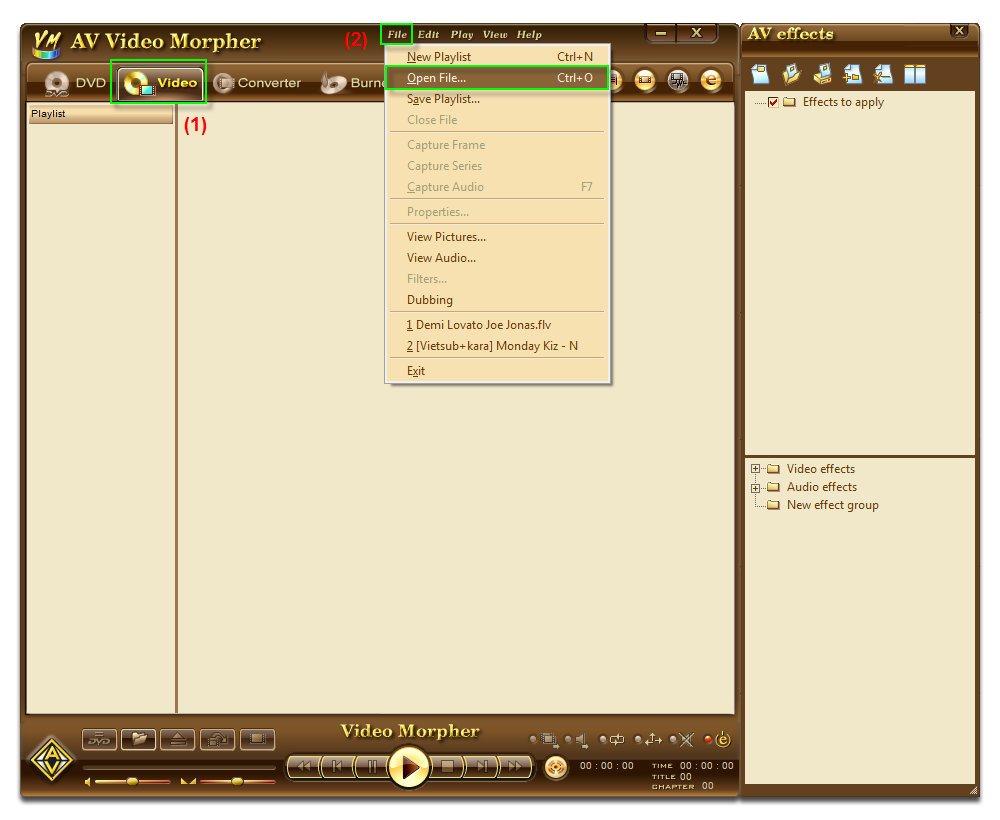
- In Video Morpher, select the Video tab (1) >> go to File menu (2)>> Select Open File.
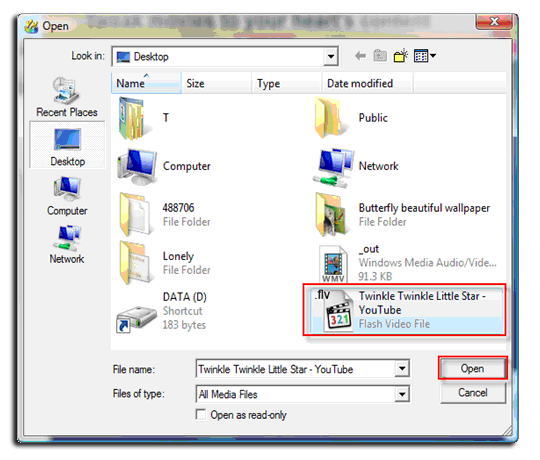
- In the Open window >> select a video clip >> Open.
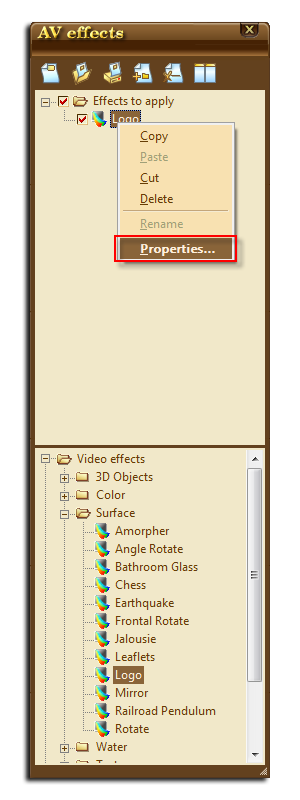
- In the AV Effects panel on the right, look down to the Video Effects tree, find the Surface group, and choose Logo (1).
>> Double click Logo to add it into the Effects to apply panel (on top) (2).
>> Make sure that both the checkboxes of Logo and Effects to apply are all checked. This will allow you to see how the image will be shown on your clip.

- In the Effects to apply panel, right click on Logo >> select Properties …
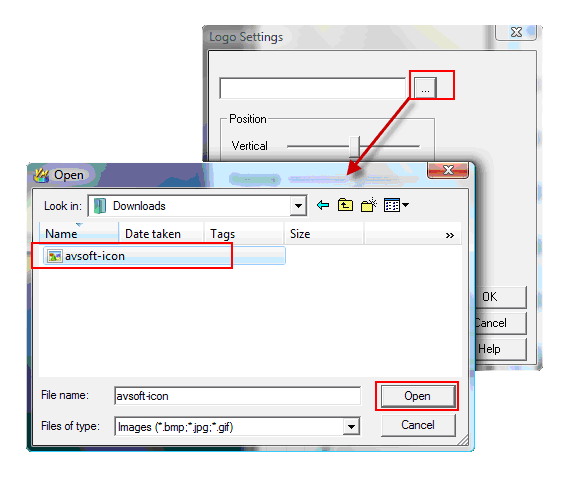
- In the Logo Settings windows >> select Browse (…) button >> choose the image you want to add as the logo for your clip >> click Open.
- Change the position of the logo by adjusting the Vertical and Horizontal sliders underneath.
-Change how the logo appears on the screen with the Transparency and Scale sliders.
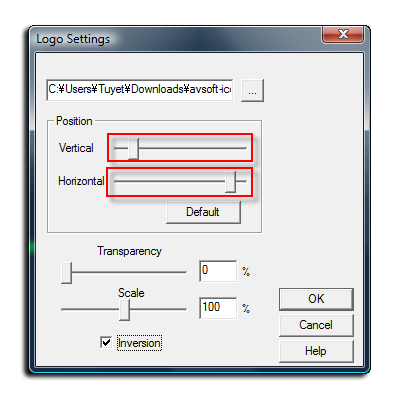
- Click OK to finish editing.
- Return to the Video tab, click on the Converter button at the bottom of the panel.

The Converter module will be shown:
>> Select the Output tab (1):
+ Choose the output format: AVI (2)
+ Video Compressor: Microsoft RLE (3)
+ Audio Compressor: MPEG Layer-3 (4)
+ Output file: Select is place where you want your new video will be saved. (5)
>> Click Convert (6) and wait for the process to be done.

Now your clip has had a mini logo as you wish.

Subscribe newsletter
- Product using tips
- Free gifts
- Special discount offers
