- FAQs
-
Tutorials
Product Tutorials
- AV Voice Changer Software Product
- Voice Changer Software Diamond 9
- Voice Changer Software Diamond 8
- Voice Changer Software Diamond 7
- Voice Changer Software Gold 7
- Voice Changer Software Basic 7
- AV VoizGame 6
- AV Music Morpher Products
- Music Morpher
- Music Morpher Gold
- Video & Webcam Products
- AV Video Morpher
- AV Webcam Morpher
Freeware Tutorials
- AV MP3 Player Morpher
- AV RingtoneMAX
- AV DVD Player Morpher
- AV Video Karaoke Maker
- AV Digital Talking Parrot
- AV Tube
- AV MIDI Converter
- Media Player Morpher
- Media Player Morpher
- AV Audio Converter
- AV Audio & Sound Recorder
- AV Audio Editor
- AV Audio Morpher
- AV CD Grabber
- AV Media Uploader
- AV Video Converter
General Tutorials
- Update log
- Add-ons
- Forum
- Press releases
Customer Login
- Using Video Morpher 3.0 to export video clip with your logo on it
- How to use Video Effects like Subtitle and 3D Subtitles - Video Morpher Tutorials
- Installation Guide
- How to convert a DVD or Movie (Video)
- How to make video clip with cool graphic effect in AV Video Morpher
- Add subtitles to video clip and movie
- Making your own CD, DVD
- How to use Funny Space
How to use Video Effects like Subtitle and 3D Subtitles - Video Morpher Tutorials
(4.1 out of
5
based on
21 votes)
INTRODUCTION
AV Video Morpher is an all-in-one home and commercial Movie editor. With this one-stop video tool, you can play and morph audio - video streams in real-time, add video and audio effects to movies, convert video files to AVI, WMV …, dub movies, capture images, record DVD audio, burn VCD, design DVD/CD covers, and amazingly useful, create 3D subtitle.
This tutorial will guide you the way to create 3D subtitles for video clips in AV Video Morpher
| Click on the steps below to start | Expand all | Collapse all |
- Start the program by clicking on the AV VOM icon on your desktop or go to Start >> All Programs >> AV Video Morpher.
- In Video Morpher, select the Video tab (1) >> go to File Menu (2)>> Select Open File.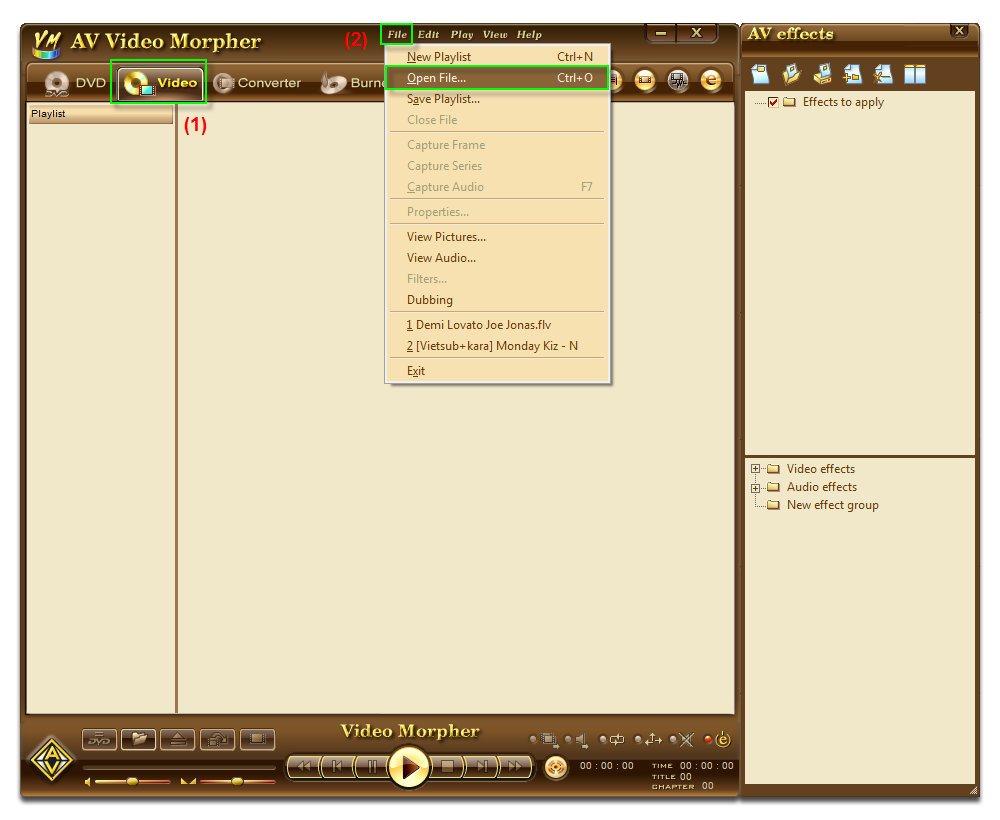
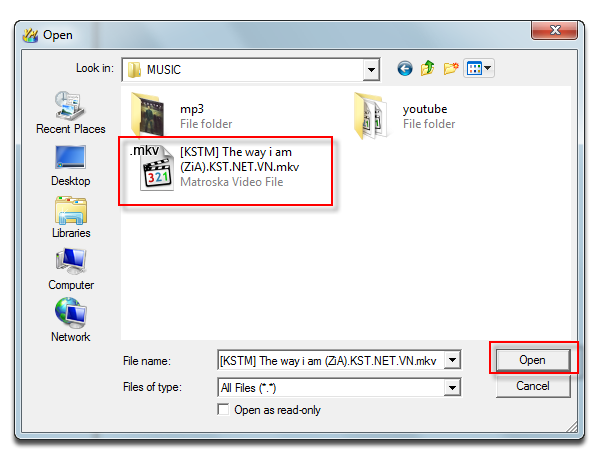
- In the Open window >> select a video clip >> Open.
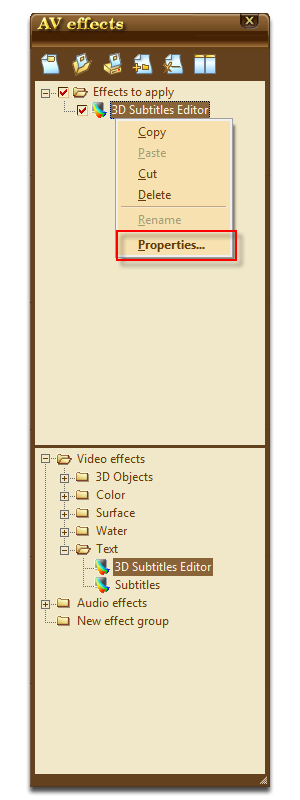
- In the AV Effects panel on the right, look down to the Video Effects tree, find the Text group, and choose 3D Subtitles Editor (1).
>> Double click 3D Subtitles Editor to add it into the Effects to apply panel (on top) (2).
>> Make sure that both the checkboxes of 3D Subtitles Editor and Effects (3) to apply are all checked . This will allow you to see how the subtitles will be shown on your clip.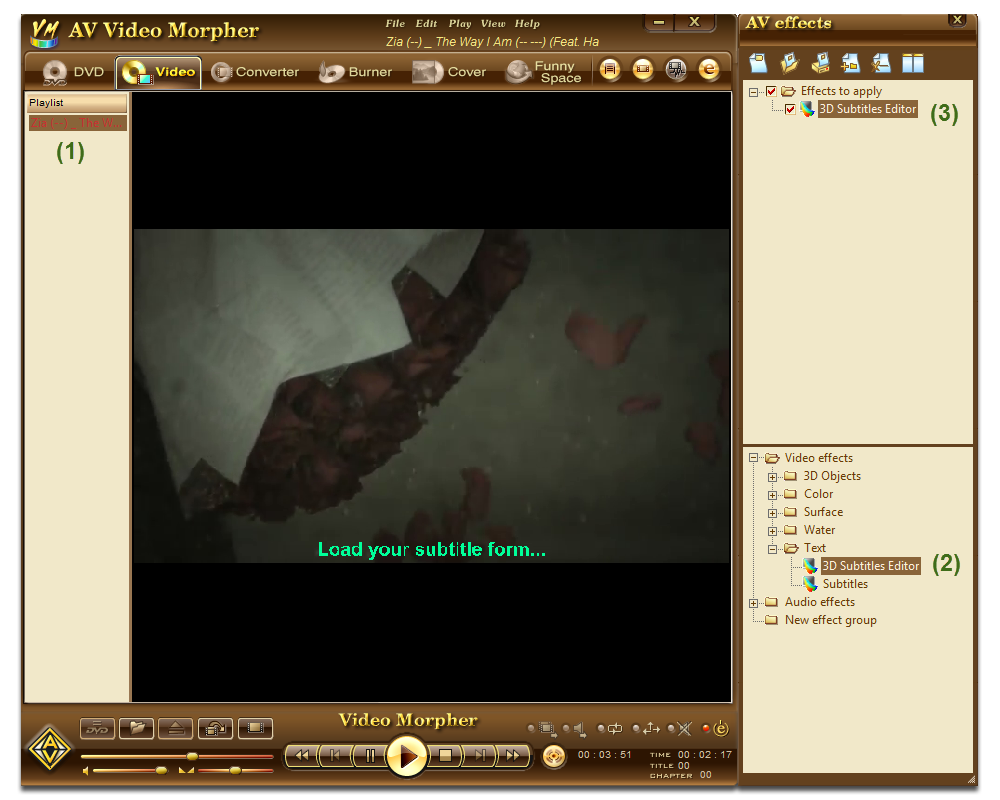
- In the Effects to apply panel, right-click on 3D Subtitles Editor >> Select Properties…
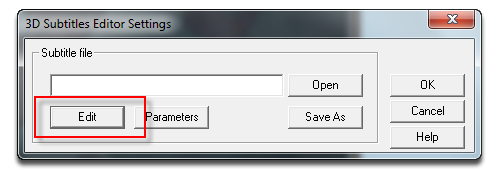
- In the 3D Subtitles Editor Settings window>> Click on the Edit button to open the Subtitle viewer window.
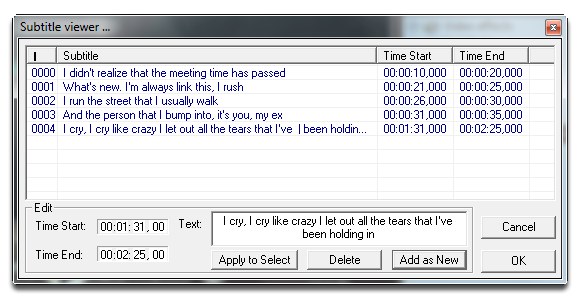
- In Subtitle viewer >> Add subtitle content in the Text textbox, and specify the interval of each subtitle into the Time Start and Time End boxes>> Click on Add as New button
When you have added all the subtitles for the clip, click OK.
The table on top will show all the subtitles you have added for the clip.
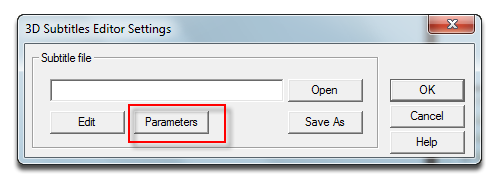
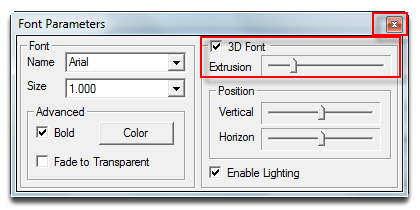
- Return to the 3D Subtitles Editor Settings window >> Click on the Parameters button.
- In the Font Parameters window >> check on the 3D Font checkbox >> make adjustment on the Extrusion slider underneath to change how the 3D effect be on the subtitle.
Tip: This window also allows you to change the appearances of the subtitle, either font size, font type, font color, etc.
Make changes until you are pleased with the result. Click the Close button to close this window.
- Click Save as to save the new subtitle with all the settings you have just made. Click OK to close the settings window.
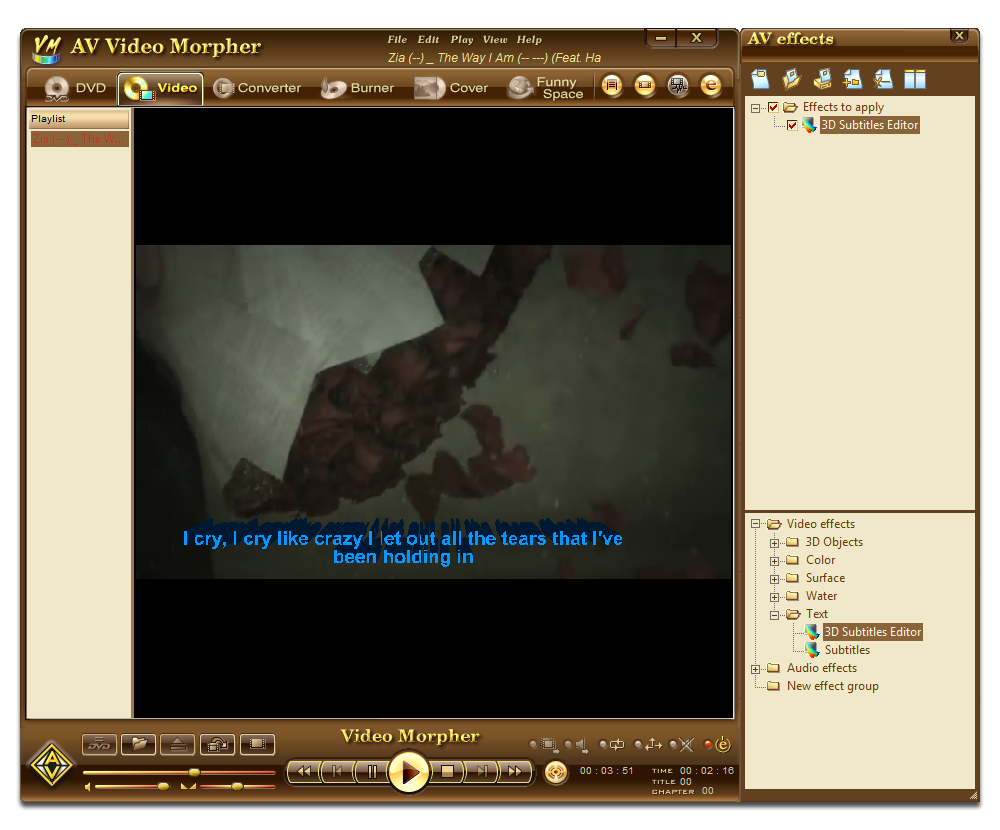
Your clip now has subtitles with 3D effect.
Check for further tutorial on creating 2D subtitles for your video clips.
Subscribe newsletter
- Product using tips
- Free gifts
- Special discount offers

