- FAQs
-
Tutorials
Product Tutorials
- AV Voice Changer Software Product
- Voice Changer Software Diamond 9
- Voice Changer Software Diamond 8
- Voice Changer Software Diamond 7
- Voice Changer Software Gold 7
- Voice Changer Software Basic 7
- AV VoizGame 6
- AV Music Morpher Products
- Music Morpher
- Music Morpher Gold
- Video & Webcam Products
- AV Video Morpher
- AV Webcam Morpher
Freeware Tutorials
- AV MP3 Player Morpher
- AV RingtoneMAX
- AV DVD Player Morpher
- AV Video Karaoke Maker
- AV Digital Talking Parrot
- AV Tube
- AV MIDI Converter
- Media Player Morpher
- Media Player Morpher
- AV Audio Converter
- AV Audio & Sound Recorder
- AV Audio Editor
- AV Audio Morpher
- AV CD Grabber
- AV Media Uploader
- AV Video Converter
General Tutorials
- Update log
- Add-ons
- Forum
- Press releases
Customer Login
- Sing on Kanto Karaoke in different voices with Voice Changer Software Diamond
- Record and save files in mono
- Sing on Red Karaoke in different voices
- Prepare mono audio files for Non-human Voice Changer
- How to talk like Sister Abigail
- Change voice during Amazon Chime meetings
- Talk like Mary the little girl in Gifted 2017
- Change voice in OBS Studio
Record and save files in mono
(5.0 out of
5
based on
3 votes)
Mono audio, or one single channel audio, is the preferable audio type to process a vocal track because of its identical and accurate quality. For that reason, many key functional features in Voice Changer Software Diamond 9, including Non-human Voice (NHV), Voice Comparator, Parody Mixer, and Parody Maker, require mono audio files for their voice morphing and processing.
In this tutorial, we will demonstrate step-by-step how to record your voice and save the recordings in mono, using the built-in Sound Recorder.
| Click on the steps below to start | Expand all | Collapse all |
On Voice Changer Software Diamond main skin, click on Utitlities button and select to open Voice-Overs Editor.
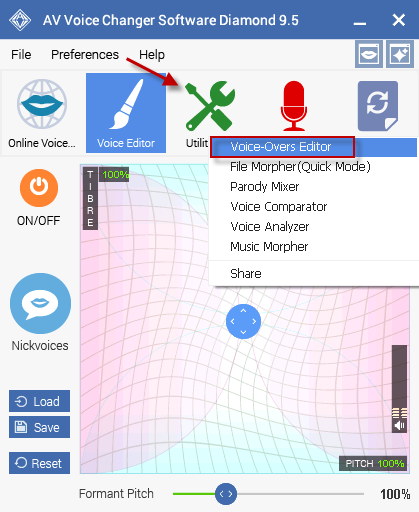
Via Voice-Overs Editor main skin, click on Recorder button to open the advanced Sound Recorder.

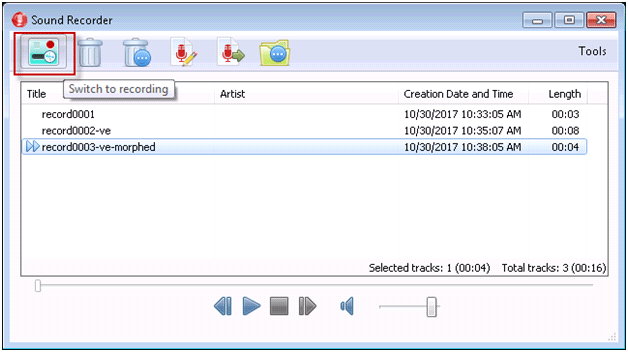
Because the default user interface of Sound Recorder is in recordings managing mode, we need to switch the interface into recorder mode using the mode switching button as in below image.
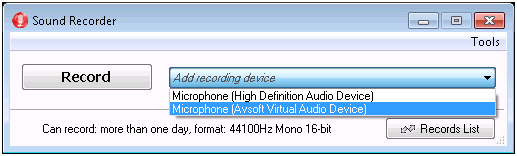
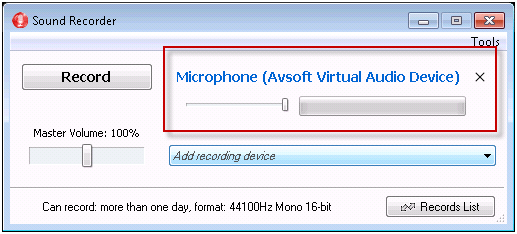
In the recorder mode interface, select from which sourced device you would want to record the audio from.
To record your voice without affecting by voice morpher of Voice Changer Software Diamond, just select Mircrophone (High Definition Audio Device). To record your voice with voice morphing effects (your voice changed in pitch, timbre, tempo, etc.), select Microphone (Avsoft Virtual Audio Device).
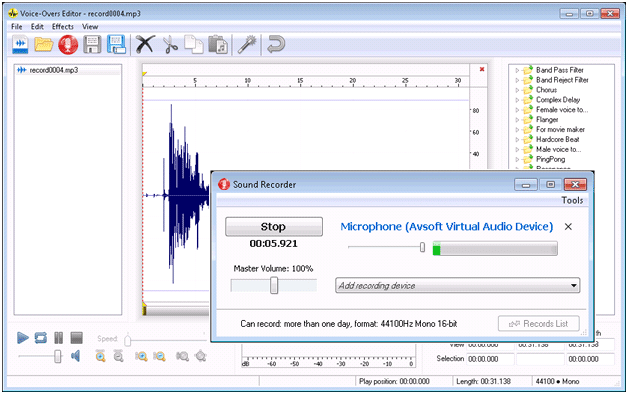
After selecting the recording device, the program’s interface should look like below:
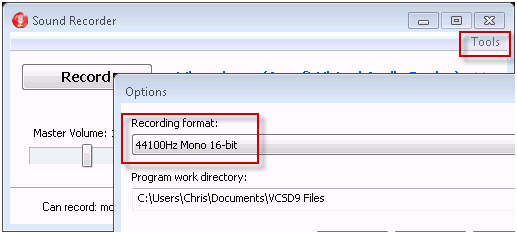
Go to Tools, select Options to change the output settings as mono type. It is recommended to select output profile as 44100Hz Mono 16-bit. Hit OK to save the changes and back to Recorder interface.
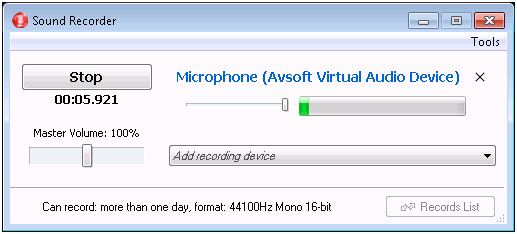
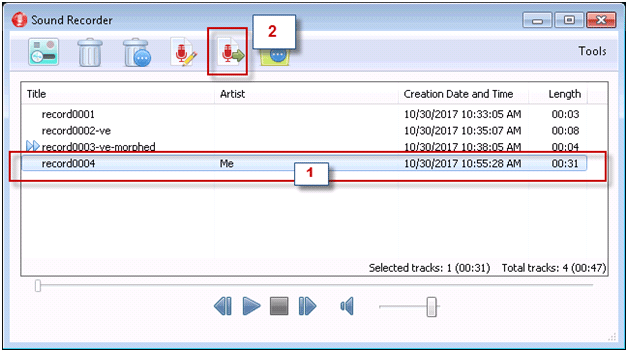
Hit Record button to start the recording. Click Stop to stop the recording.
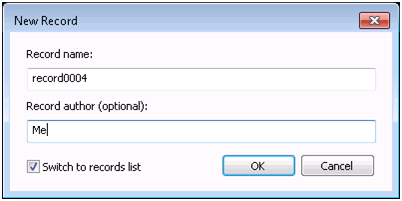
As soon as the recording is stopped, a dialog box will appear and asks for entering name for the recording.
Give it a name and hit OK button to end the recording process. The Sound Recorder will now switch back to recording managing mode itself.
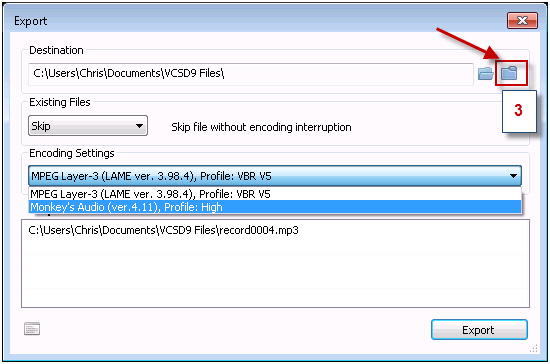
Current version of the program supports 2 very common output profiles for saving the recording. One profile is in MP3 format as for lossy quality and another one is in APE format as for lossless quality.
Select either MP3 or APE format as you wish, then from the Export window, hit the Export button to start the saving process.
**Note: the Open containing folder icon (3) is for quickly accessing your saved recordings.
It's all done. Your saved recording should be in mono type now.
It's all done. Your saved recording should be in mono type now.
Subscribe newsletter
- Product using tips
- Free gifts
- Special discount offers