- FAQs
-
Tutorials
Product Tutorials
- AV Voice Changer Software Product
- Voice Changer Software Diamond 9
- Voice Changer Software Diamond 8
- Voice Changer Software Diamond 7
- Voice Changer Software Gold 7
- Voice Changer Software Basic 7
- AV VoizGame 6
- AV Music Morpher Products
- Music Morpher
- Music Morpher Gold
- Video & Webcam Products
- AV Video Morpher
- AV Webcam Morpher
Freeware Tutorials
- AV MP3 Player Morpher
- AV RingtoneMAX
- AV DVD Player Morpher
- AV Video Karaoke Maker
- AV Digital Talking Parrot
- AV Tube
- AV MIDI Converter
- Media Player Morpher
- Media Player Morpher
- AV Audio Converter
- AV Audio & Sound Recorder
- AV Audio Editor
- AV Audio Morpher
- AV CD Grabber
- AV Media Uploader
- AV Video Converter
General Tutorials
- Update log
- Add-ons
- Forum
- Press releases
Customer Login
- VCS vs Ventrilo
- Change voice while using XFIRE with Voice Changer Software in VAD mode
- VIRTUAL AUDIO DRIVER (VAD) - CHANGE VOICE FOR VOICE COMMUNICATION IN ONLINE GAMES
- Change voice while using Roger Wilco with Voice Changer Software in VAD mode
- Change voice while using GSC with Voice Changer Software in VAD mode
- Change voice while using Windows Live Messenger with Voice Changer Software in VAD mode
- Change voice while using Callcentric with Voice Changer Software in VAD mode
- Change voice while playing EverQuest II (EQII) with Voice Changer Software in VAD mode
Change voice while using XFIRE with Voice Changer Software in VAD mode
INTRODUCE
The new version of AV Voice Changer Software has a Virtual Audio Driver (AVnex Virtual Audio Device) which works as a virtual audio & sound device. This device can be used with any VoIP application and Instant messengers for changing voice and/or recording in real-time. By setting AVnex Virtual Audio Device as the active audio driver for the microphone in those applications, you will be able to control your voice tone and speak the way you want.
In this tutorial, we demonstrate how to use the Voice Changer Diamond 7.0 for changing your voice in XFIRE.
What is the XFIRE?
The Xfire Game SDK provides game developers with an easy way to extend the information shown for their game on the Xfire system. You can see how the use of the Xfire Game SDK could allow this Guild Wars player to show off his location, player name, and title.
Requirements:
You should have XFIRE installed and set up probably in your computer first. Check detailed information from its website.
STEPS TO TAKE
| Click on the steps below to start | Expand all | Collapse all |
On VCS7 main panel, click Preferences to open the Preferences dialog box.
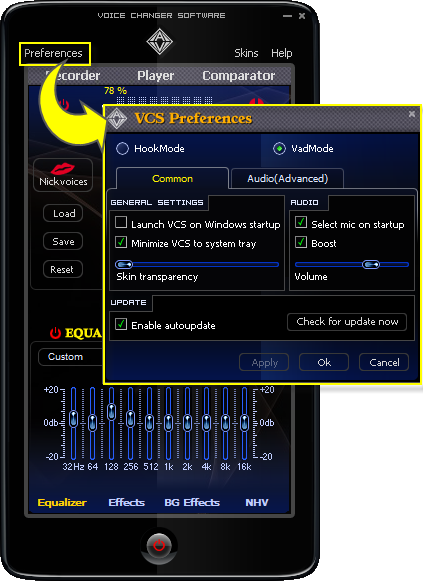
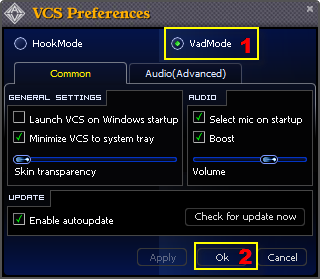
In the Preferences dialog box, we will change Hook mode to Virtual Audio Driver mode.
- Check VadMode (1).
- Click the OK button (2) to apply the new settings and close the Preferences dialog box.
- Run XFire, and log in your account.
- Choose menu Tools » Options to open XFIRE's settings dialog (see fig 3).
- In the Options dialog box, select Voice tab (see fig 4).
- In the Devices section, choose Avnex Virtual Audio Device.
- Click OK to finish.

From now on, VCS Virtual Audio Driver will be the main audio driver recognized by XFIRE.

Return to VCS7, choose the morphing effects for your voice, and make adjustments until you are satisfied with the output voice.
Note: You should have known how to change voice using Voice Morpher feature, and other voice changing features of VCS.
You now can do voice conversation with XFIRE in game. The morphing settings for your voice will be applied automatically.
Note: While VCS Virtual Audio Driver is being set as the audio driver for XFIRE, do NOT turn off VCS7 when doing voice chat via XFIRE. If you don’t want to use VCS7, change the audio settings of XFIRE back to normal audio source.
For more information on XFIRE, visit its website.
Subscribe newsletter
- Product using tips
- Free gifts
- Special discount offers