- FAQs
-
Tutorials
Product Tutorials
- AV Voice Changer Software Product
- Voice Changer Software Diamond 9
- Voice Changer Software Diamond 8
- Voice Changer Software Diamond 7
- Voice Changer Software Gold 7
- Voice Changer Software Basic 7
- AV VoizGame 6
- AV Music Morpher Products
- Music Morpher
- Music Morpher Gold
- Video & Webcam Products
- AV Video Morpher
- AV Webcam Morpher
Freeware Tutorials
- AV MP3 Player Morpher
- AV RingtoneMAX
- AV DVD Player Morpher
- AV Video Karaoke Maker
- AV Digital Talking Parrot
- AV Tube
- AV MIDI Converter
- Media Player Morpher
- Media Player Morpher
- AV Audio Converter
- AV Audio & Sound Recorder
- AV Audio Editor
- AV Audio Morpher
- AV CD Grabber
- AV Media Uploader
- AV Video Converter
General Tutorials
- Update log
- Add-ons
- Forum
- Press releases
Customer Login
- Change voice while doing voice chat via Psi with AV Voice Changer Software
- Change voice while doing voice chat in Digsby with Voice Changer Software
- Change voice while using X-LITE with Voice Changer Software in VAD mode
- GET STARTED
- Make fun calls with VoIP programs and voice instant messenger programs
- Change voice while using Ventrilo in VAD mode
- How to change your voice in VoipStunt with Voice Changer Software 7.0
- How to change voice while working on Dim Dim Webinar with Voice Changer Software 7.0
Change voice while doing voice chat in Digsby with Voice Changer Software
(1.0 out of
5
based on
1 vote)
INTRODUCE
The new version 7.0 of AV Voice Changer Software has a Virtual Audio Driver (AVnex Virtual Audio Device) which works as a virtual audio & sound device. This device can be used with any VoIP, Instant Messenging applications, or online voice chatting or web conferencing websites for changing voice and/or recording in real-time. By setting AVnex Virtual Audio Device as default audio driver for microphone in those applications, you will be able to control your voice tone and speak the way you want.
What is Digsby?
Digsby is a instant messaging, email notification and social networking tool.
In this tutorial, we will guide you through the way to set up Voice Changer Software 7.0 (VCS7) to automatically change voice for online voice communication on Digsby.
>>Requirements:
You should have Digsby installed and set up probably in your computer first. Check detailed information from its website.
STEPS TO TAKE
| Click on the steps below to start | Expand all | Collapse all |
On Voice Changer Software 7.0 main panel, click Preferences to open the Preferences dialog box.
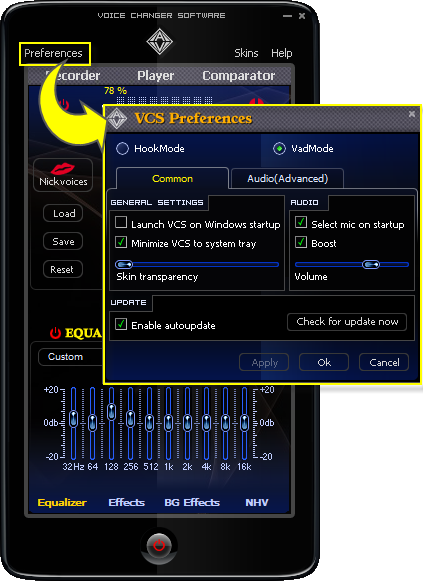
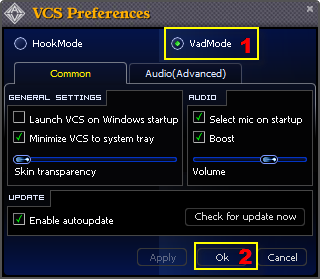
In the Preferences dialog box, we will change Hook mode to Virtual Audio Driver mode.
- Check VadMode (1).
- Click the OK button (2) to apply the new settings and close the Preferences dialog box.
- Log on to Digsby.
- In a Message window, click the Video button.( see Fig. 3).

- The Audio/Video Call dialog is open. Choose the Settings icon. ( see Fig. 4).

- On Select a Camera box, click Next. ( see Fig. 5)

- On Select a Microphone dialog, choose Microphone (Avnex Virtual Audio Device), click Next. ( see Fig. 6)

- On Test the Sound box, click Next. ( see Fig. 7)

- On Adobe Flash Player Settings box: Checked Allow and Remember , click Close ( see Fig. 8)

- On Save Settings box, click Close. ( see Fig. 9)

From now on, VCS Virtual Audio Driver will be the main audio driver recognized by Digsby.
Return to Voice Changer Software 7.0, choose the morphing effects for your voice, and make adjustments until you are satisfied with the output voice.
Note: You should have known how to change voice using Voice Morpher feature, and other voice changing features of VCS.
You now can voice chat with Digsby. The morphing settings for your voice will be applied automatically.
Note: While VCS Virtual Audio Driver is being set as the audio driver for Digsby, do NOT turn off Voice Changer Software 7.0 when recording via Digsby. If you don’t want to use Voice Changer Software 7.0, change the audio settings of Digsby back to normal audio source.
Subscribe newsletter
- Product using tips
- Free gifts
- Special discount offers