- FAQs
-
Tutorials
Product Tutorials
- AV Voice Changer Software Product
- Voice Changer Software Diamond 9
- Voice Changer Software Diamond 8
- Voice Changer Software Diamond 7
- Voice Changer Software Gold 7
- Voice Changer Software Basic 7
- AV VoizGame 6
- AV Music Morpher Products
- Music Morpher
- Music Morpher Gold
- Video & Webcam Products
- AV Video Morpher
- AV Webcam Morpher
Freeware Tutorials
- AV MP3 Player Morpher
- AV RingtoneMAX
- AV DVD Player Morpher
- AV Video Karaoke Maker
- AV Digital Talking Parrot
- AV Tube
- AV MIDI Converter
- Media Player Morpher
- Media Player Morpher
- AV Audio Converter
- AV Audio & Sound Recorder
- AV Audio Editor
- AV Audio Morpher
- AV CD Grabber
- AV Media Uploader
- AV Video Converter
General Tutorials
- Update log
- Add-ons
- Forum
- Press releases
Customer Login
Audio Morpher – How to add effects to audio files
(2.9 out of
5
based on
7 votes)
Audio effects is an essential part to make your music or audio products sound more professional and enjoyable. AV Audio Morpher is a free new advanced audio effects editor that offers a long list of special sound effects and a clear, easy-to-use interface.
This 4-step tutorial will show how to start with boring same audio files and end up with exciting, impressive outputs.
| Click on the steps below to start | Expand all | Collapse all |
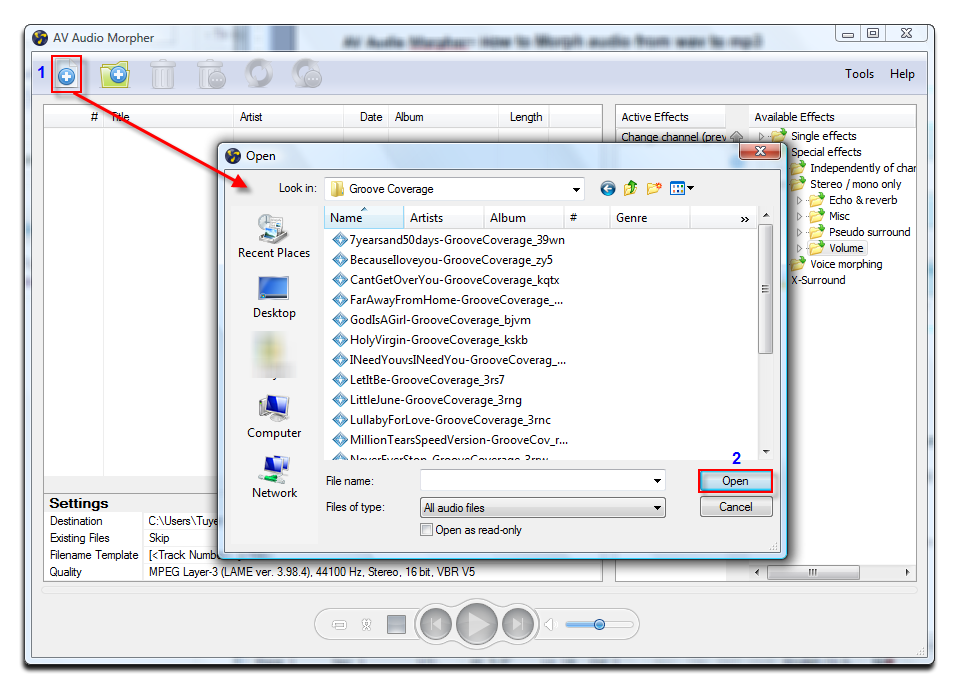
On main interface of the program, click Add file(s) to morph or Add directory to morph:
- To open a single file or to select files one by one, click Add file(s) to morph (1).
>> Select file(s) >> Click Open (2).
- To add an entire folder of files, click Add directory to morph (3) >> Choose folder >> Click OK (4).
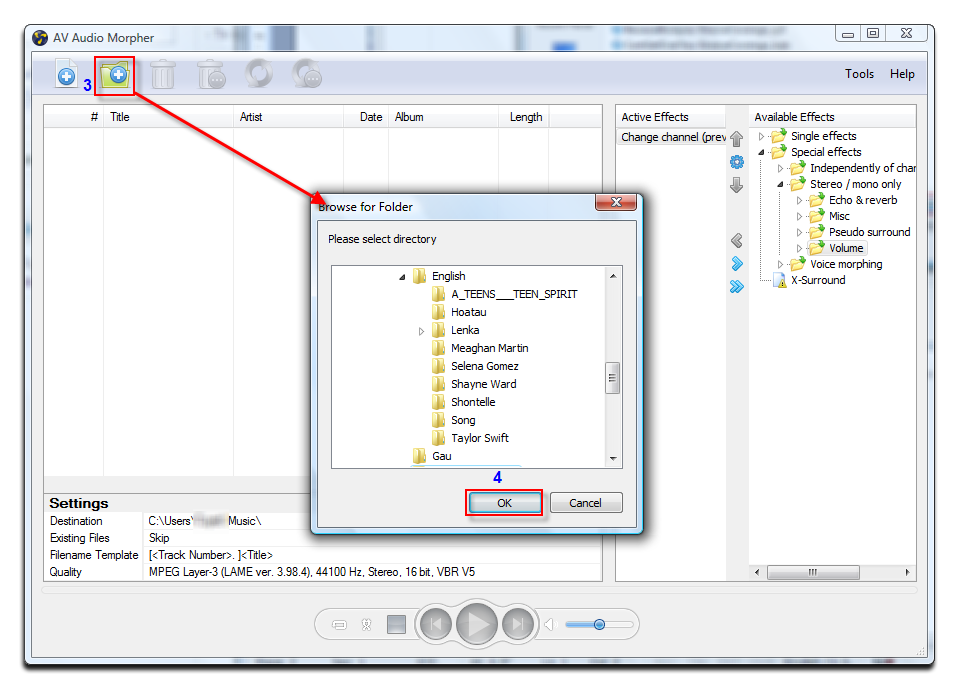
Then the added files will be listed down in the input area with their further information.
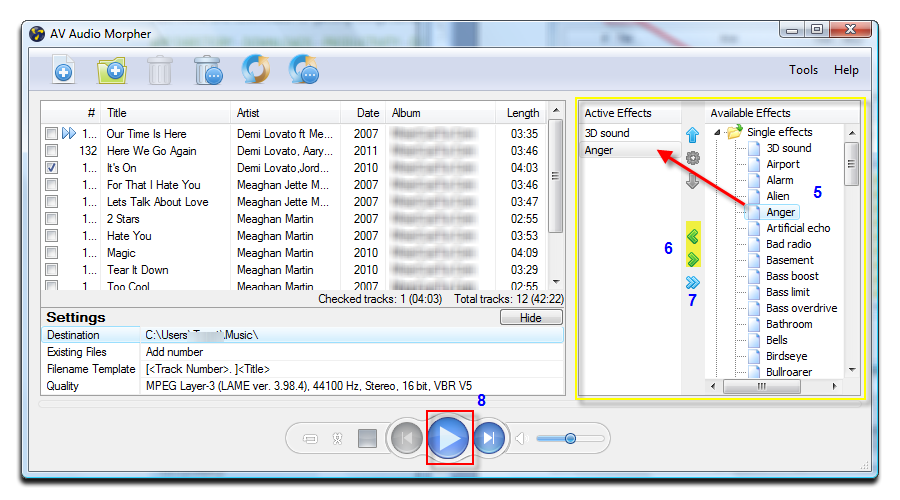
- Find Effects panel on the right of main interface.
- In Available Effects list, select audio effect(s) >> Double-click (5) to add it to Active Effects list.
Note:
• Use < and > buttons (6) to move/remove effects between Available Effects and Active Effects.
• Use >> buttons (7) to remove all effects from Active Effects.
• Use ↑ or ↓ button to change effects’ orders and decide the priority of processing effects.
- Click Play (8) on player bar to preview audio with effects applied.
* Some special effects are customizable. You may need to refer this tutorial to learn how to make further settings on them.
You can configure your output file settings within the Settings panel.
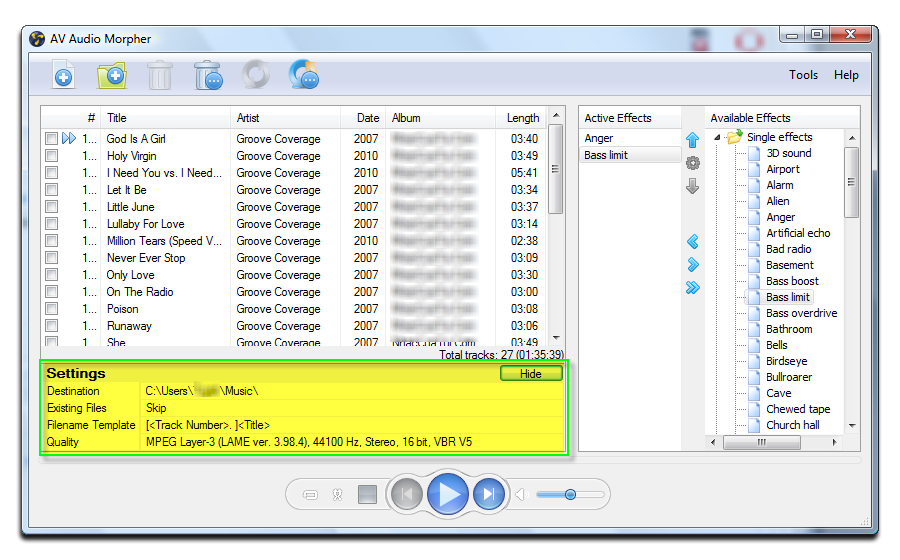
* Destination
- Click on Destination option to choose destination folder for output files.
- If you check on Source track folder (12), output files will be saved in the same folder of your input files.
- If you check on Specific folder (13), you can leave the path as default. Otherwise, click Browse (14) >> Navigate to where you want to save your file >> Click OK to save change and close.
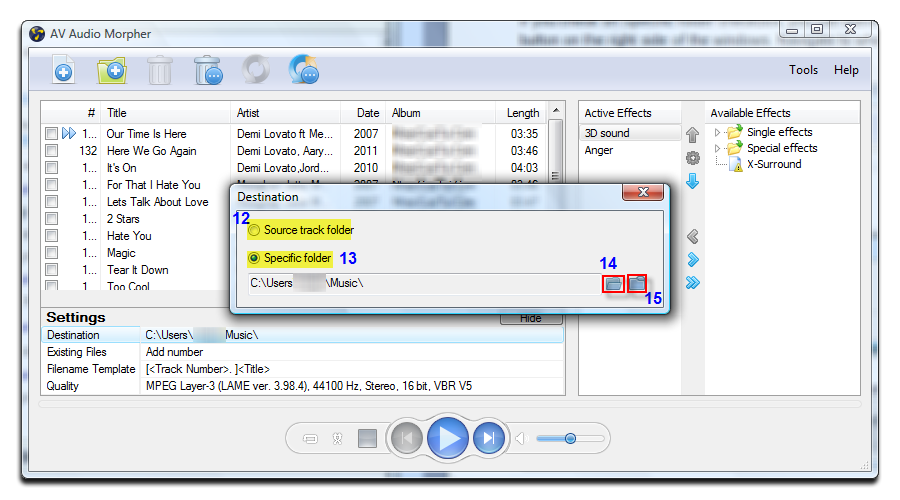
Note: Click Open output folder (15) to show up your destination folder.
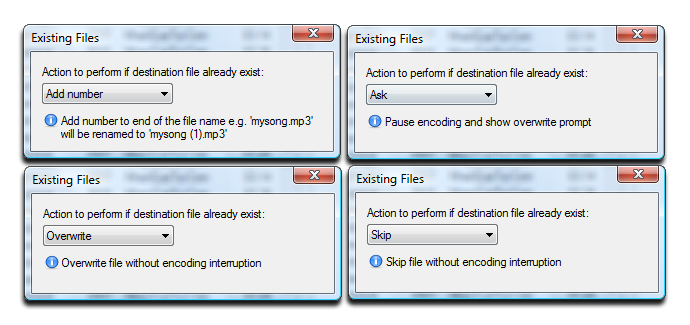
* Existing Files
Click Existing File option to teach AV Audio Morpher what to do if there are duplicate files in the same output folder.
4 options available:
* Filename Template
This option will help you to name all your output files according to a specific template and hence make your music library much easier to organize and manage.
- Click Filename Template option.
- In Filename Template dialog box, click Insert » Add tag entries to the name template according to your desired order. Preview the output names of currently listing tracks in the table below.
- Or click Insert » Presets and pick a ready-to-use name template.
Note:
• Edit the displayed output names right in the template bar.
• You can separate each tag with the others by common symbols.
* Quality
- Click Quality (9) option.
- In Quality dialog box, choose output format from the drop down list (10).
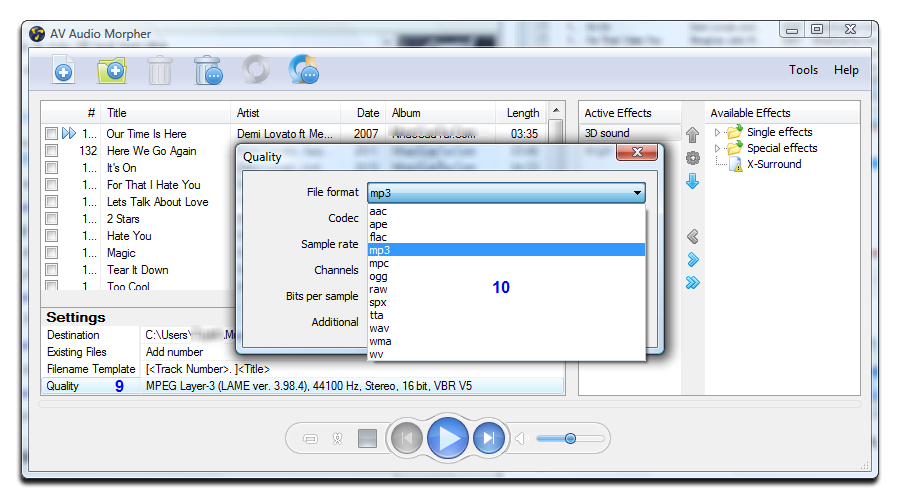
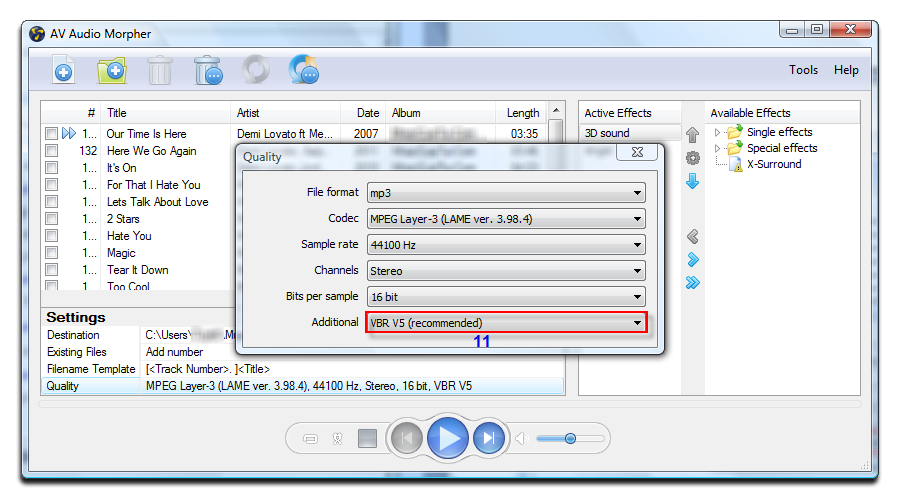
You can also select appropriate Codec, Sample rate, Channels, Bits per sample, or Additional options for the output files.
Note: If you do not sure what to do, after selecting File Format, just leave other parameters as default. Any wrong selection in this step may cause the output quality worse than expected.
When you’re ready to export the files:
- Check on files you want to morph » Press Morph checked tracks (16)
- Or use Morph all tracks (17) to start morphing all files in list.
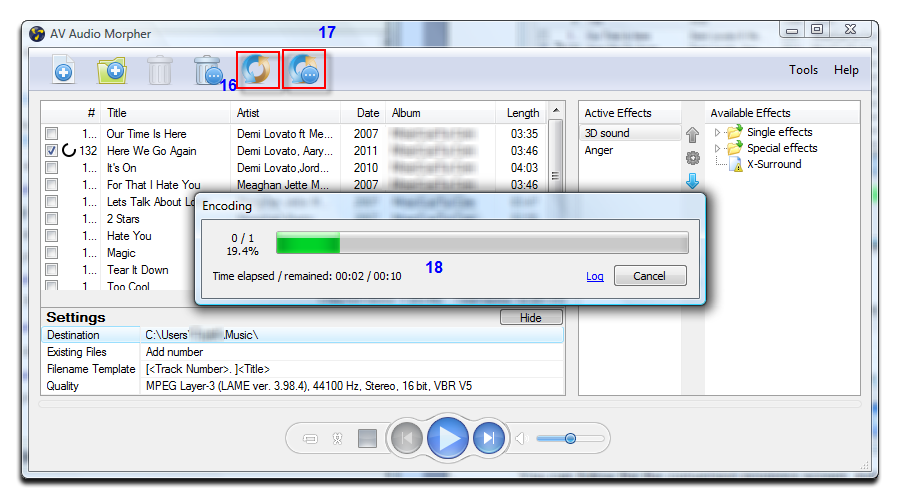
Encoding window comes out and the progress bar will display status of the overall progress.
- The process may take a few seconds or longer to complete depending on number of files and output quality.
- Click Cancel (18) if you want stop the process.
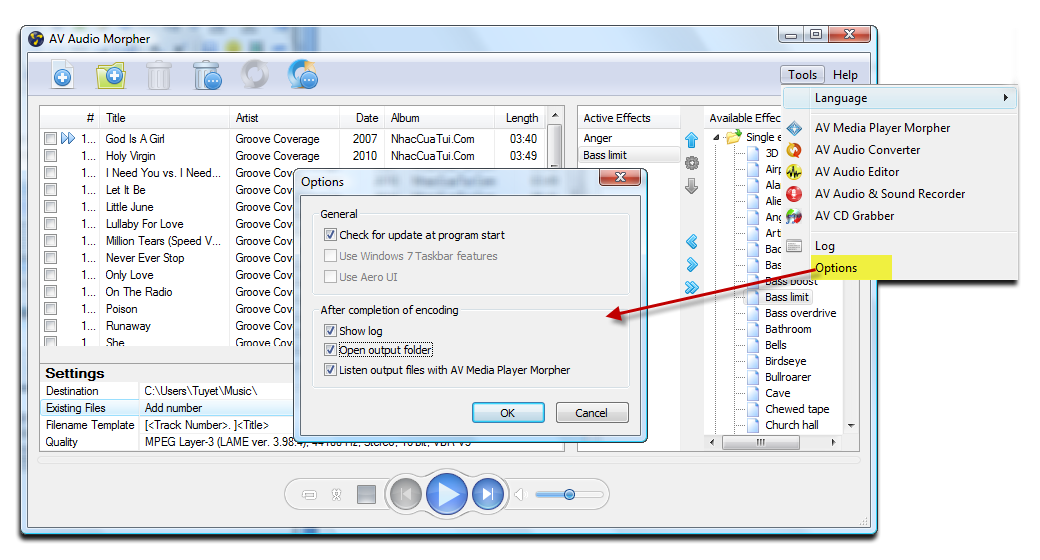
Note: On main interface, go to Tools » Options to set what to do after complete the morphing process.
Subscribe newsletter
- Product using tips
- Free gifts
- Special discount offers
